Capturing a Spark: Building an Ember with Char Cloth
Without our modern conveniences, which can produce a flame on demand, many people will struggle to light a fire. Add in other factors outside of our control, and a dangerous situation may develop when there is actually a pressing need for fire.
With this article, I begin a series called Ember to Flame. Throughout the series, I will be looking at alternate methods of creating fire that do not require matches or lighters. Instead, we will focus on how to create heat in the form of an ember, and how to use that ember to produce the flame required for fire.
The Ember to Flame material I want to draw attention to in this article is called char cloth. Have you ever heard of it? No? Well, nowadays most people have not, but that wasn’t always the case. At the end of this article, I will share the easy process of making your own char cloth.
What is char cloth?
Char cloth is what I would call a bridging material. It readily catches the heat of a single small spark and begins to slowly smoulder, allowing you the opportunity to transfer it into a small tinder bundle where a flame can be coaxed out with light breaths or a slight breeze. So, what is char cloth, how does it work, and most importantly, how do we get it? Char cloth is simply a natural fabric (like 100% linen or cotton) that has been transformed into almost pure carbon by heating it in a low-oxygen environment. This process of transformation is known as Pyrolysis.
Pyrolysis comes from Ancient Greek: pyro (πῦρ) meaning “fire” or “heat,” and lysis (λύσις) meaning “separation” or “decomposition.” Pyrolysis literally means “separation by fire” or “heat-induced breakdown.”
Due to the way char cloth is made, instead of the material being reduced to ash as heat is applied, it releases its combustible gases (pyrolysis) and leaves behind the carbonized structure of the original natural fabric.
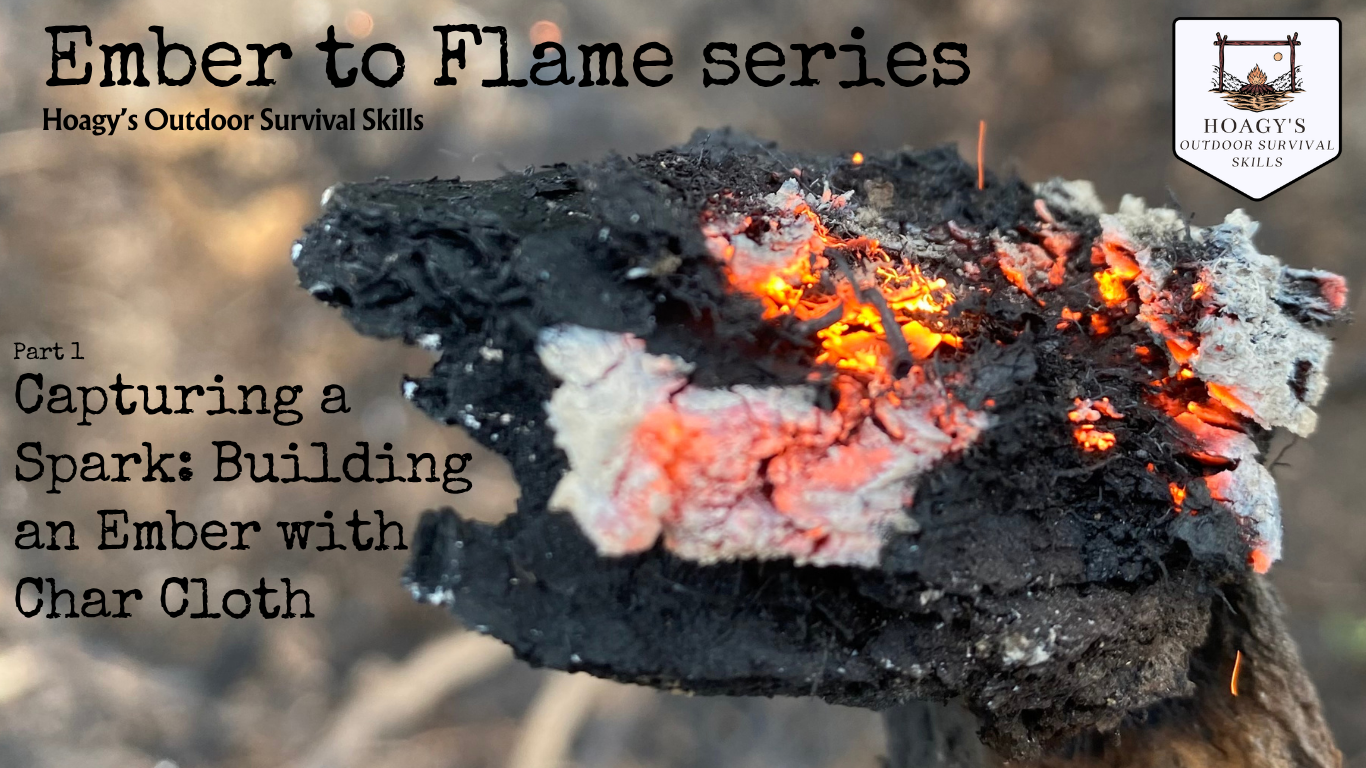
The benefit of this remaining carbonized structure is that it requires only a minimal amount of applied heat, such as a single spark or minimal solar concentration, to begin smouldering. This is exactly the result we are looking to achieve. There is a large selection of natural tinder or initial ignition fuels that are so soft and fluffy that they flare up quickly and then burn out just as fast. In our HOSS FireCraft courses, we demonstrate what these flash fuels are like: easily lit, and gone in a moment. This is what separates slow-burning char cloth from this type of fuel. Char cloth will hold heat in a stable ember, and that heat only increases with your decision to supply additional oxygen.
Using char cloth for an ember
A standard method for using char cloth in fire lighting is done with steps similar to the following:
- Place or tuck a piece of char cloth into your tinder bundle (remember, tinder is dry materials thinner than a pencil lead)
- Apply heat to the char cloth (spark from a ferrocerium rod, empty lighter sparks, Fresnel lens and sun, etc.)
- Look for a small glowing orange ember on the cloth. One is all you need
- Fold the tinder bundle around the cloth
- Blow gently but steadily to increase the embers heat
- The char cloth ember will ignite the surrounding tinder materials
- Place the burning bundle into your prepared fire lay and feed it small pieces of kindling as it grows (thin dry branches)
Char cloth itself does not create flame, it provides the sustained heat that other materials need to ignite
Char cloth limitations
Char cloth does have limitations, which is why it is notably absent from most modern fire-starting products. As a pre-burned material, the cloth is extremely fragile and will break apart if overhandled. It is not waterproof, and while it is easy to produce at home or in the field, you do need an existing fire to make more of it. It can also be messy to handle due to soot on the container and, ultimately, your hands. On the positive side, most of these limitations can be managed with a little thought and preparation if you choose to include char cloth in your fire kit.
What does char cloth look like?
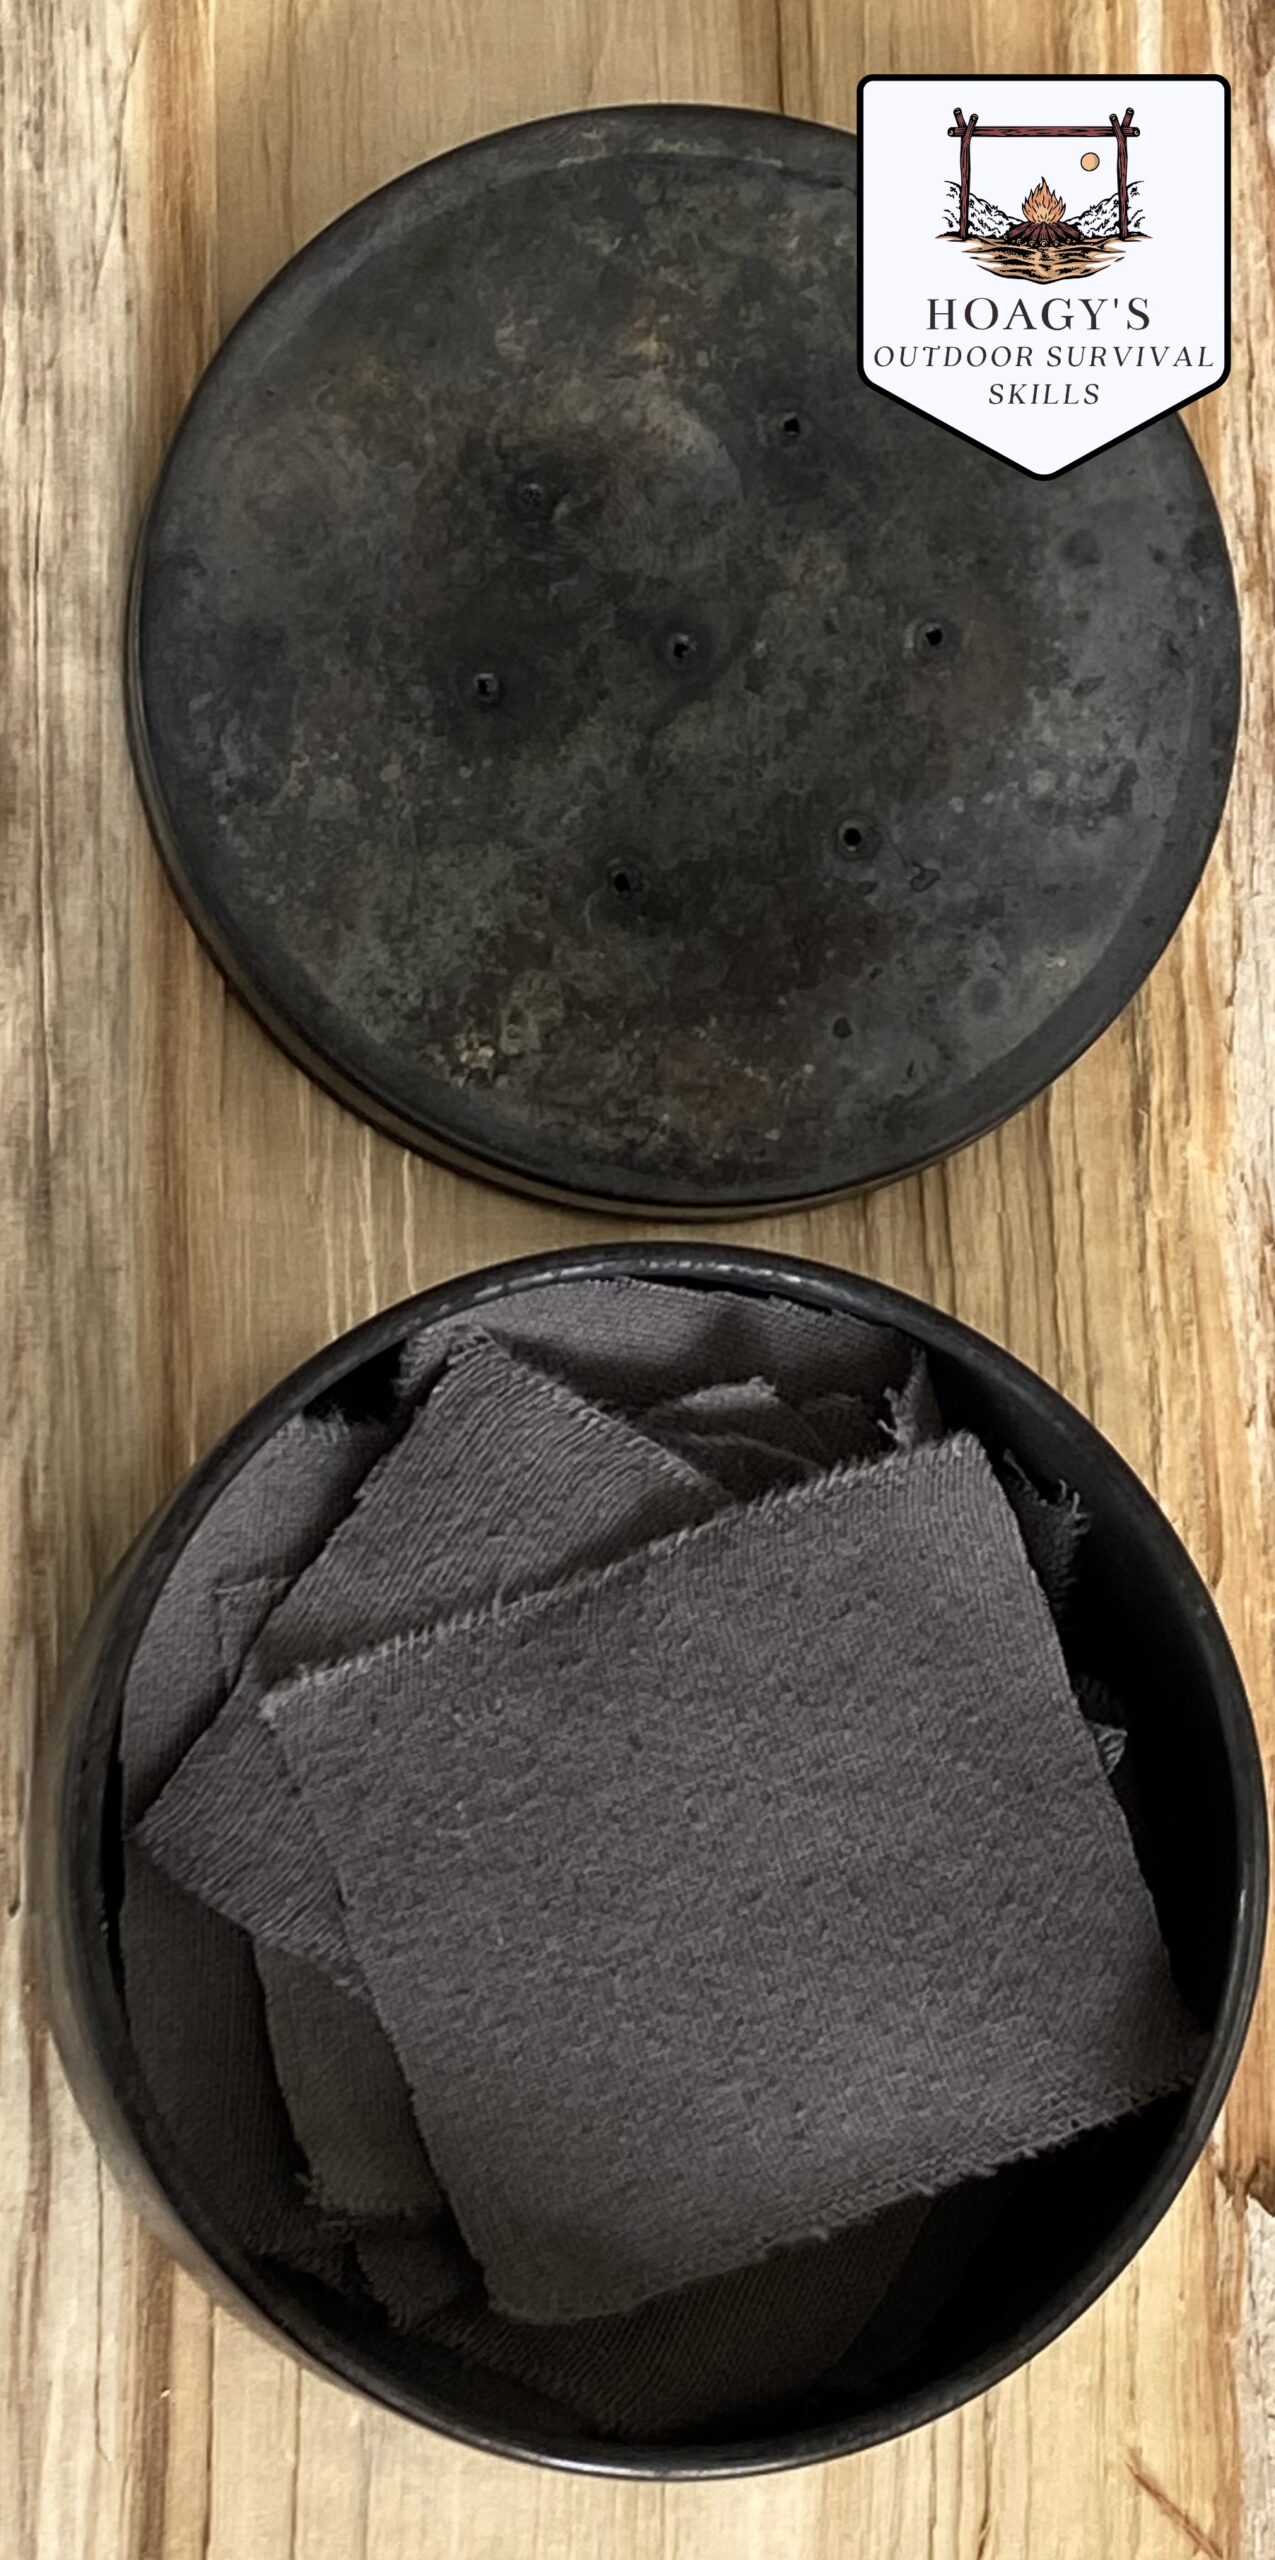
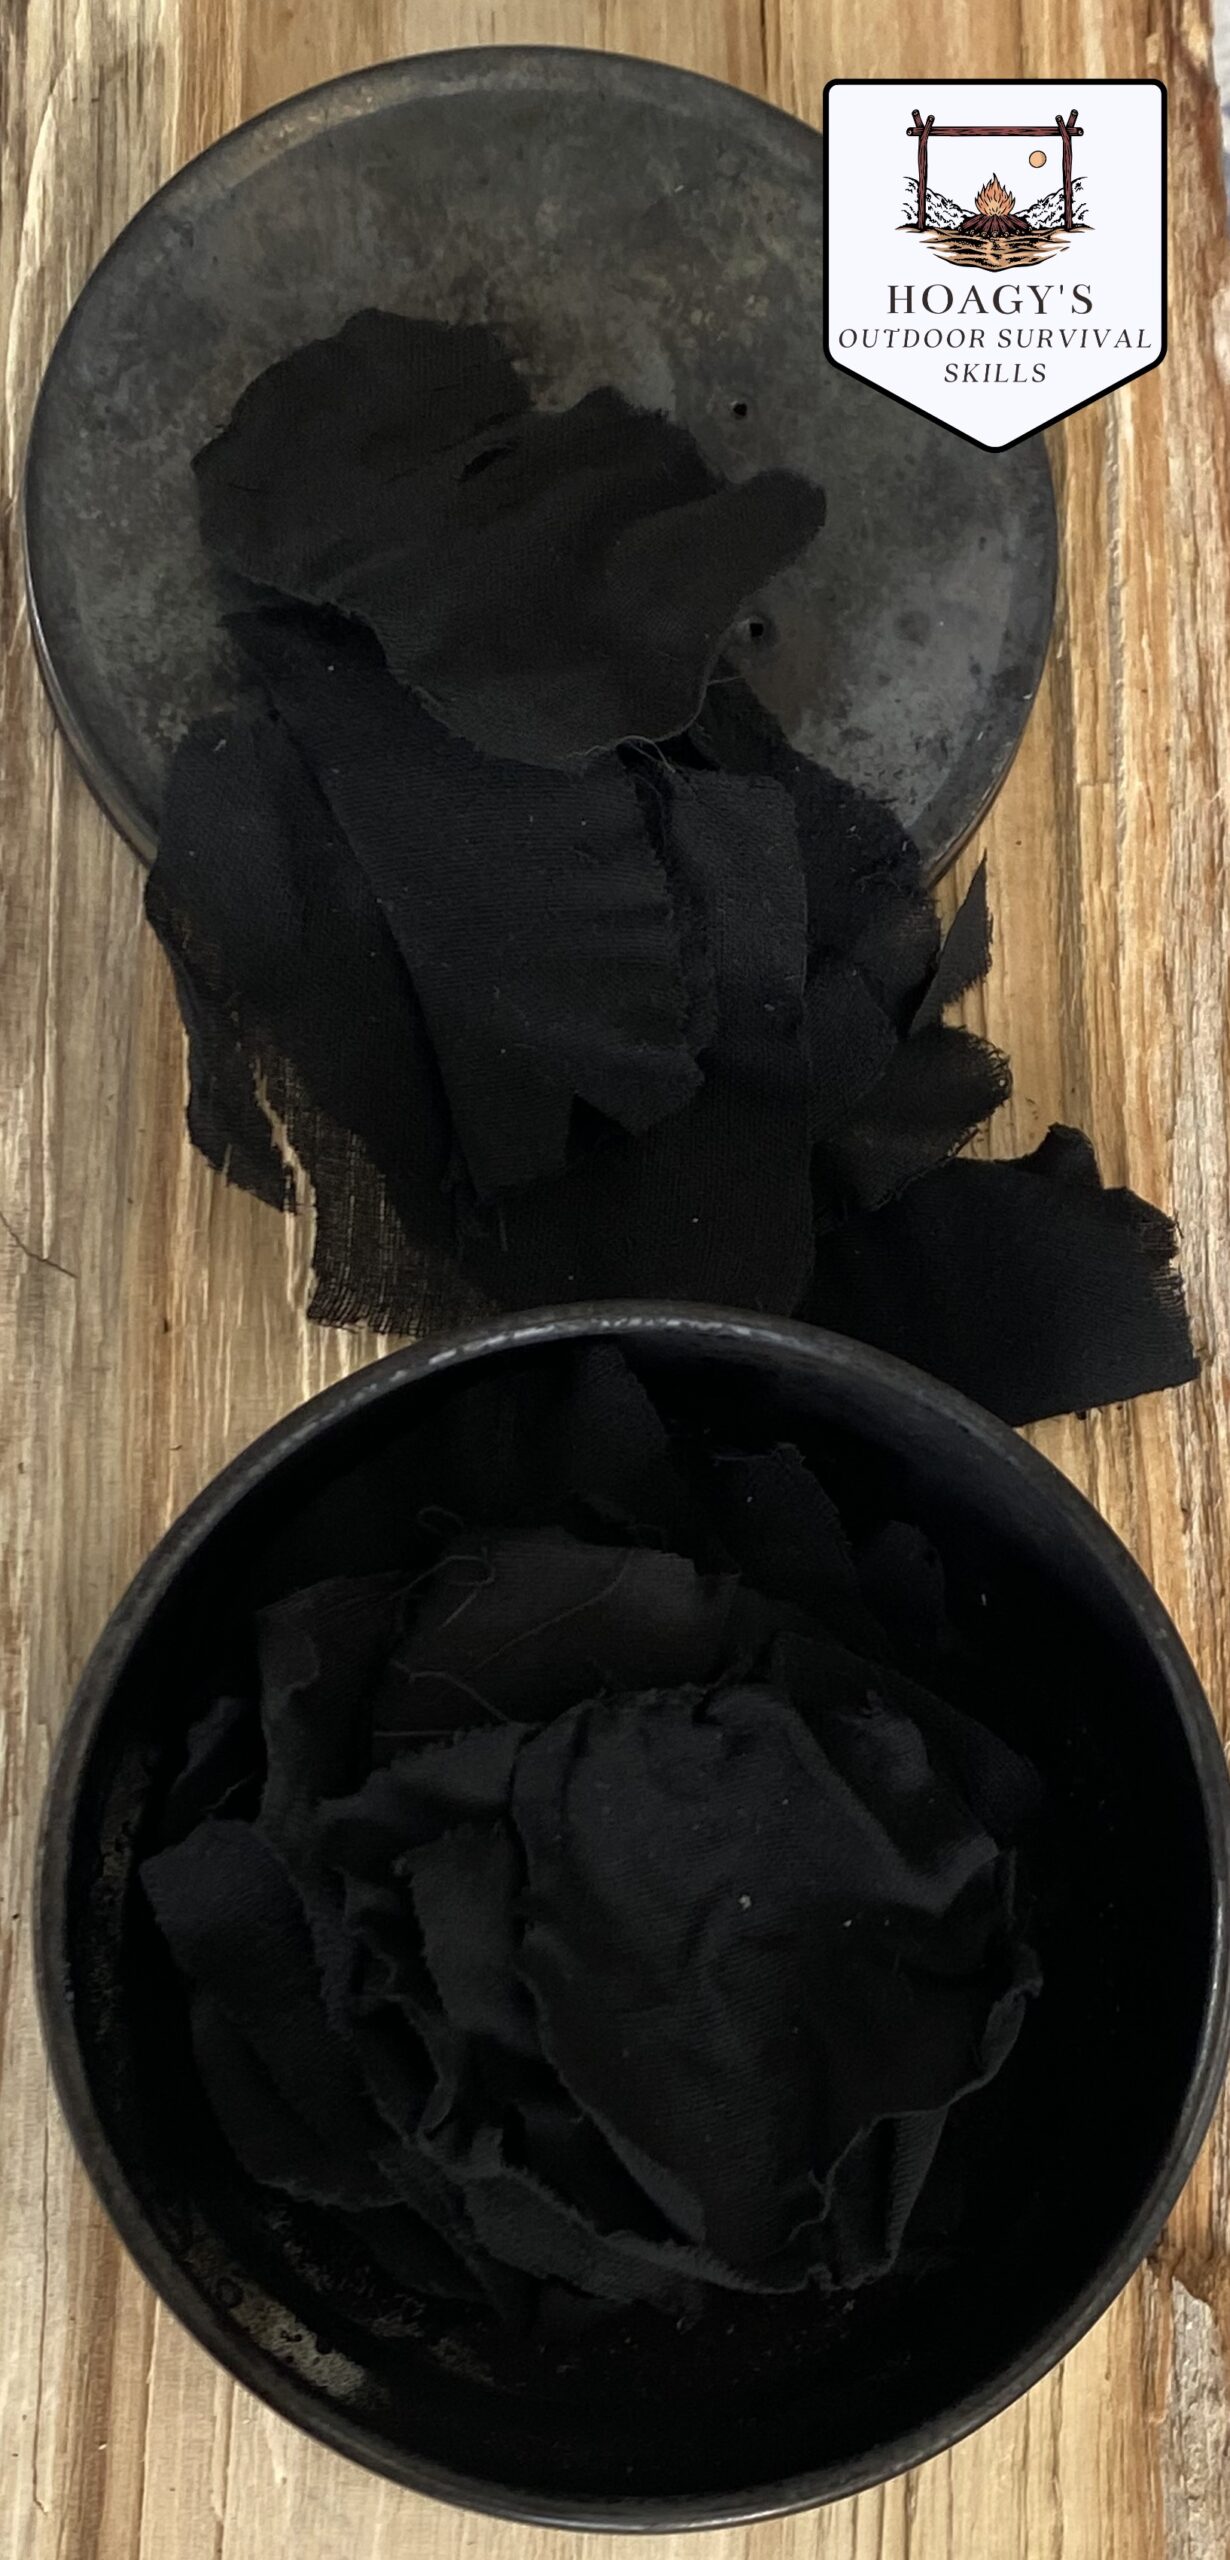
Good char cloth has a matte black appearance. It holds its original shape from before the pyrolysis process but will be very fragile, tearing easily. Testing a new batch is simple and should be done in a fire-safe area. Light one piece with a spark and look for a small glowing ember.
If you have made your own char cloth following the directions below and it turns to dust, then it has been over-burned or too much oxygen entered the container. If the material appears brownish, it was not fully pyrolyzed before being removed from the heat and allowed to cool.
Synthetic materials and blends cannot be used for char cloth, as they will melt or produce inconsistent results. The material must be 100% cotton or linen, which is inexpensive and readily available in t-shirts, bedsheets, and denim jeans (especially from thrift stores or the back of your closet!)
Making char cloth
Making char cloth is not difficult. Here is a method you can use whether at home in your fire pit or to replenish your supply in the field.
Equipment:
- Metal tin (a small candy tin or Altoids-style tin works perfectly)
- Hammer and a thin nail (to poke a few small vent holes in the lid)
- Heat source (fire, coals, or camp stove)
Process:
- Cut cloth into small squares (approximately 5 cm or 2 inches)
- Loosely place them inside the tin
- Close the lid
- Place in the fire or on coals
After a short time, you will see:
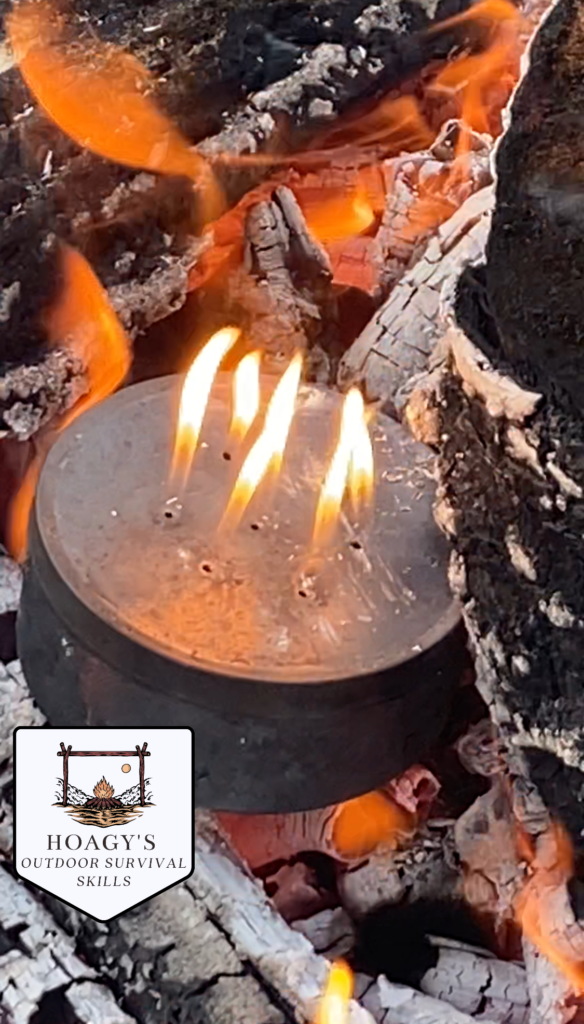
- Smoke or flame venting from the holes. These are the pyrolysis gases burning off
- Wait until flames stop coming out of the vent holes
- Remove the container and immediately flip it over to cover the vent holes. Allow it to cool completely before opening
If you open the container too early while it is still hot, oxygen may enter and ignite the material inside, leaving you with ash instead of char cloth
It all starts with an ember
Char cloth is a simple and effective way to understand the progression from spark to flame. It teaches that fire does not begin with flame, but with controlled heat and a well built ember. By learning how to capture a spark and grow it with the right materials and steady oxygen, you build a skill that applies far beyond a single method. This is the foundation of the Ember to Flame series. In next month’s article, we will continue to build on this approach by exploring another way to create and sustain an ember, and move one step closer to reliable fire when it matters most.